Sunday, October 16, 2011

Its Just Not Happening - Yet

Well, we haven’t progressed any further – as yet. Raymond went back to work at the end of his August holidays and that was that. I have spent some time in The Shed just thinking about how we should move forward but that doesn’t get us anywhere. I have decided to narrow at least part, of the shelf along the back wall to 300 mm instead of the initially proposed 610 mm to allow easier access to the future air-conditioning unit. Raymond and I have also agreed to have the air-con unit installed before we progress the baseboard construction in this section – hopefully before the end of November.

We went over to Austral Modelcraft on Saturday 10 September where Raymond bought one of the newly released Bachmann 0-4-2T Porters. Unlike the DC only original 0-4-0T and 0-4-2T porters, these are fitted with DCC and Tsunami sound. He tested it when we got home and it has some issues. It tends to stall on the pointwork which seems to be a common problem judging by the discussions appearing on the Railroad Line Forum web newsgroup.


Raymond is still adding to his Garden Railway collection even though he has not got any closer to starting an outdoor layout. He recently purchased an Accucraft Michigan-California Lumber Co. No.2 2-cylinder Shay-geared loco in live steam. This came from Caboose Hobbies in the United States. It was a limited production model and they were sold out very quickly.
Another purchase Raymond made from Caboose Hobbies was three packs of four flat cars in On30. These are made by AMS and each have a different running number. Four of the cars are lettered for the Denver & Rio Grande Western, another four are lettered Colorado & Southern and the remaining four are Rio Grande Southern.
These AMS wagons certainly have a lot of detail. They cost a bit more but the detail and being to scale length they are worth it.
Raymond has also purchased some On30 model kits, this time from the UK. These came from Backwoods Miniatures through their E-Bay shop. He purchased the following –
• Bachmann Shay dress-up kit
• Bachmann Climax dress-up kit
• Vertical boiler steam loco GNAT to fit a Bachmann Davenport 0-4-0 gas mechanical
• Steam crane/loader to fit a Bachmann Davenport 0-4-0 gas mechanical
• Conversion kit to convert a Bachmann 2-8-0 into a 2-8-2ST
• Conversion kit to convert a Bachmann 2-6-0 into a 2-6-2T
• And just for some whimsy an Aero Car
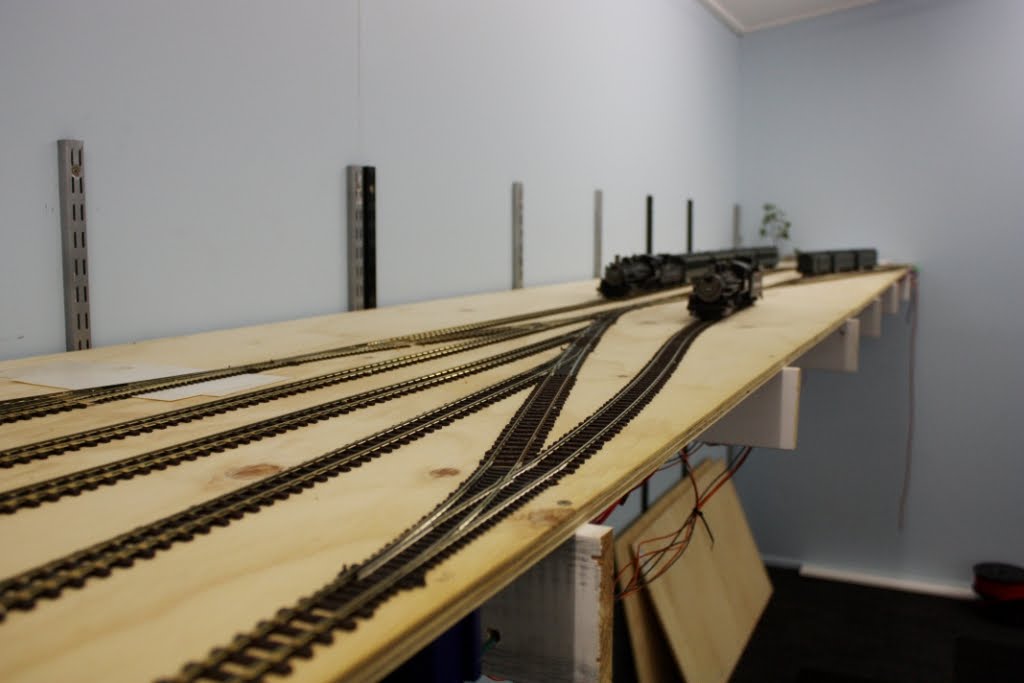
Continuing his recent purchases Raymond has bought six large radius points for his Garden Railway from Austral Modelcraft and some special curves and short straights from Gauge 1 Gallery. The impetus for this being that we have decided to exhibit a Garden Railway layout at the Queensland Model Railway Exhibition to be held at The Workshops Rail Museum over the weekend of the 29-30 October. We will be doing this in conjunction with some of our fellow Garden Railway enthusiasts from AMRA. Raymond will be running live-steam as well as electric locos. The layout will be a simple oval with two passing loops (one at the front and one at the back) which will be built on the day on trestle tables provided by the Museum.

My present for Raymond’s birthday way back on the 24 September finally arrived last week. It is an O-Scale laser-cut wood kit of Ophir Depot on the Rio Grande Southern from Banta Modelworks.
Ophir Depot laser-cut kit by Banta Modelworks

We have quite a number of laser-cut wood kits to build so I have been looking for a suitable grey primer that is solvent based rather than acrylic (water based). The water will make the wood warp so it is a no-no. Once the wood is properly sealed then acrylic paints can be used.

Bill Banta from Banta Modelworks, has given me a few helpful hints following an enquiry I made to him. The guys on On30 Conspiracy also came forward with a lot more suggestions.

I bought a spray can of grey primer from the new Masters store at Springfield last week and a bottle of Floquil matt grey paint from Austral Modelcraft to try out. As a test bed I bought two HO Scale laser-cut kits produced by Northeastern Scale Models from Austral to use as an experiment. One is a small storage shed and the other a box and crate factory.
Northeastern Storage Shed laser cut kit in HO Scale.
Box & Crate Factory by Northeastern
Raymond has recently completed one of his four slate wagon kits by Slaters in the UK.


This is 16 mm Scale and runs on 32 mm gauge track. He has done an excellent job but I think it needs weathering.


Sunday, August 28, 2011

Its About Time.....

It has been a long time between drinks – ah sorry, I meant to say it has been a long time since I posted anything on this Blog.

I had thought Raymond and I would have achieved a great deal on the layout in The Shed but such was not to be. Raymond has had a months holiday starting at the beginning of August and I took a week’s holiday as well during Ekka Week. Raymond had great plans but they didn’t eventuate. The almost completed section along the left-hand wall.
During his first week he worked on trying to fit a Lok-Sound DCC chip and speaker to an AMS model of No.50 the Rio Grande narrow gauge 0-4-0DM. Although the model looks deceptively large when Raymond dismantled it there was just nowhere to fit the decoder let alone the speaker. He had the decoder specially programmed with a Caterpillar diesel engine sounds which the original locomotive had fitted. Back to square one! Raymond has reassembled the loco and put it back in the display case muttering to himself.

During my week off we fitted the double-slotted metal brackets to the right-hand side wall of The Shed.
"Missed it by that much". Notice all the pencil marks. Even using a laser stud finder it is still difficult to determine the exact location of a stud.

The brackets and L-girders completed on the right-hand wall. The baseboard along here withh be about 2 ft 3 ins wide.

Around the corner and along the back wall. There will be ajunction station mid-way along the right- hand wall with a short mining branch heading towards the back wall and a major mining branch heading in the opposite direction.

We made the L-Girder for the right-hand wall and fitted those to the metal brackets. Although we followed the same method of construction as the left-hand wall we found that all the brackets were not dead level so we had to shim the L-girders in a few places. This was most frustrating as we asked ourselves “How did this happen?

I had always intended that the section of layout along the back wall of The Shed would combine in a scene the upper and lower levels. The upper track would cross the lower on a high trestle while the lower track would traverse a deep river gorge. As it turns out we decided that the brackets on the right-hand wall should follow around for a couple of brackets on the back wall so as to allow the curve to come around fully to track across the back of The Shed. We decided to do this on the right-hand wall as well with the brackets continuing probably for just over a third of the way across the back of The Shed. This will allow for a mining branch to terminate at a couple of mines in the back right-hand corner and across the back wall of The Shed.

We installed the brackets for these two sections at the end of my week’s holiday. We also made and fitted the L-girders for this section. I was sitting down at my work bench looking back down The Shed with a satisfied look on my face that we had at least achieved something. But hold on “We have a problem Houston”. My thoughts turned to the future air-conditioning unit on the back wall of the shed. Would the installer be able to install that heavy unit working across the top of the 2 feet wide baseboard framework (and potentially track and scenery). I e-mailed by friendly electrician sending him some images. He thought not. “Could we build a section of the layout below where the air-conditioner was to be installed?” or “Could we stop work until the air-con was installed?”
This is what I saw when I was contemplating our achievements or lack thereof. The gap is where the high bridge/river gorge scenery will be installed while the air-con unit will be installed high up on the back wall.
The gap again.
We have a problem with the power supply to the house from the street power box. Our builder used the minimum size cable allowable which did not take into account any future requirements (such as air-conditioning). Our electrician is going to install heavier cabling – when we can afford it. In the meantime he asked – “Do you have any other air-conditioning in the house?” Answer “No”. Well he says you can install the air-con unit now and even use it – just make sure your wife doesn’t use the clothes drier in the laundry or oven in the kitchen if you are using the air-con in The Shed.

We don’t want to have the hassle of building a removable section of the layout as it would be the bridge section which, besides the delicate trestle bridge, would include all sorts of scenery and track connections as well as the necessary wiring connections. We do not really want to suspend work on the layout pending the laying of the heavy-duty cable from the street to the house and then installing the air-con. The cost of the air-conditioner I have been advised that we will need is $4,000 installed due to the size of the floor area of the shed let alone the cost of digging a trench and installing a heavy cable from the street to the house.

It looks like work on the On30 layout will need to be temporarily suspended pending at the very least, the installation of the air-conditioner. However, the budget is overspent at present so it will be a few months before we can afford to get the air-con installed. If we do go down this path we will have to make some rules regarding the sue of the air-con and household appliances.

Since we have come to a standstill on the On30 layout, I decided we should start work on Raymond’s N Scale layout in the garage. This will be the On30 layout that Raymond and I started building (but never finished) which was meant to go around my car. We started on Saturday 27 August by dismantling a section of the baseboard and framework that we had built previously along the right-hand side of the garage wall. We narrowed a section down so it is protrudes into my car space for the same distance along the length of that side of the garage. This will make it easier to open my car door although the original baseboard did allow me adequate access. The reduction in width has just made it so much easier.
The section of the original On30 layout which I wanted narrowed.

The same section from another angle.
On Sunday, 28 August I completed the decking on top of the rebuilt baseboard and started dismantling the yard of the On30 layout. We will get quite a few points out of this as well as quite a deal of Peco On30 Flextrack.
The rebuilt section looks quite neat now if I do say so myself. Dismantling the yard on the original On30 layout.

More salvage work on the old On30 layout. I am not sure how long it will take Raymond to build the N Scale layout but I sure that PK is hoping it is sooner rather than later.
Well this is Raymond’s last day of his annual leave. He wonders where the time has gone? Back to work Monday.

Sunday, July 17, 2011

More Buying and some Planning.....

The Tuesday Nighters met at Warren’s house on Tuesday, 12 July. The get together was very well attended. It was a good to see Bob in attendance as well after an absence over some time. Warren has been one of my success stories as he has turned to the “Dark Side”. He used to model HO Scale American and had substantially built a very nice layout with scenery completed on much of it. However, now he has changed to On30 and is adapting his HO layout to run the On30 rolling stock. He ran a Bachmann Forney (with sound) and also a Bachmann 2-8-0. He could not run through some sections of track as the cuttings in the scenery are not yet wide enough so he will have to do some “earthworks”. As usual the guys were full of suggestions as to how Warren might tackle this problem or that and the conversation was full of jokes and mutual friendship and respect. Bob invited us to his place for our next getogether on the 26 July.

PK delivered a huge carton to Raymond on Tuesday night which contained his order from M B Klein in the US. PK orders supplies regularly from M B Klein and others in our group tack their orders onto his. The box was rather large and we just barely managed to fit it into my car. Craig thought he might have to walk home. Raymond unpacked his carton the next night. He had purchased 3 boxes of trees (two trees in each) from Bachmann and a further 3 boxes of trees from Woodland Scenics (again with two trees in each box). There was also a flour mill which was ready made up and additional supplies of styrene and also brass sheet.


The O Scale Flour Mill Raymond bought from M B Klein and it cost only $60!!!! This Built-Up model is from a company associated with MTH Trains.
Some of the trees Raymond bought from M B Klein.
More trees from M B Klein
Raymond has been buying up from Gauge One Gallery in Sydney as well. During the week he received in the mail a 1:20.3 Bachmann 2-6-0 loco and two AMS Short cabooses. I have been pushing Raymond to get moving on his outdoor garden railway as he has so many 1:20.3 but nowhere to run them. Currently he is waiting on a set of air-brushes from the United States which should arrive this coming week
A recent re-release from Bachmann is this 1:20.3 Scale industrial 2-6-0 which was supplied through Gauge One Gallery.
Also from Gauge One Gallery Raymond bought two AMS short cabooses. This is the Denver & Rio Grande. The other is a Rio Grande Southern.
We visited Austral Modelcraft on Saturday morning where Raymond’s Debit Card got another working over. He bought an NCE SB3a power booster, a transformer pack to go with it and an NCE wireless throttle. That makes four NCE throttles we now have – two tethered and two wireless throttles.

We moved a cabinet fitted with glass doors into the shed today. It will allow us to display some locomotives and rolling stock as well as more storage in the cabinet underneath. In the long term it will have to be disposed of as it is occupying the site of one of our two helixes. This helix will be the last section of the layout to be built so the space is not expected to be needed for at least 12 months, perhaps longer.
The cabinet from our lounge room is now housed in the shed. Raymond wasted no time in filling the shelves with locomotives and rolling stock for display.
Here is Raymond's MMI K-27 No.455 which has been weathered by Ray at Austral Modelcraft. It is a real beauty.
Raymond has also progressed on his Foothill Model Works wooden gondola kit. He has built the body and fitted it to the bogies. He now has to add all the detailing parts.
The Foothill Model Works wooden gondola that Raymond has been building is progressing nicely.

I continue to consider the material requirements for the extension of the next section of our baseboard along the right-hand side of the shed. Hopefully, it will not be too long before we have the next section built, track laid and wired ready for operation. I would hope we might be able to get a small group together who are into On30 so that we can have a Tuesday Nighters style get together possibly on a Friday night which will eventually lead into a group to operate the layout. It is getting very exciting and, once we start running trains properly we hope to havethree or more operators plus a dispatcher and operate the railway to a timetable. If we can progress this next section to completion or near completion by the end of August I would like to start planning the construction of the main station and marshalling yard down the centre of the shed with construction to start in December. Here's hoping.


Sunday, July 10, 2011

Some Problems Solved.....

We called in to our favourite model railway shop, Austral Model Craft as usual on Saturday morning (9/07). I took my hands out of my pockets for a change and bought two O Scale structure kits by a company called Big City Hobbies. One is a cemetery kit which includes twenty headstones, a mausoleum and fencing. The other is a fencing kit. Raymond bought two packs of Heki 20 cm pine trees. Each pack contains three trees. At $41.95 per pack, they are not cheap. Raymond also bought two boxes of Peco O-16.5 track (24 lengths).

Saturday afternoon we relaid one length of track in the depot loop to locate the track centres further apart. It appears we may have solved the problem of the K-36 and
K-37 locos touching on the end of the loop nearest the back wall of the shed.

Raymond test ran the K-37 and K-36 while we both carefully watched to see if we could determine the cause of the bogie trucks derailing. We concentrated on the K-37 running it backwards and forwards through the curved turnout. The outer track radius is 60 inches and the inner is 30 inches. I thought the problems may have been caused by the 30 inch radius of the points. The MMI On30 locos are supposed to be able to negotiate a 26 inch minimum radius and that is why we selected 36 inch radius for our main lines but even though the curved points were sharper they were still supposed to be 4 inches better than the minimum recommended radius. Was this a possible cause?

We watched the bogie trucks of the K-37 very carefully. One wheel of the rear truck would ride up on the outer rail and then the whole bogie would drop off the track even on plain curved track with 36 inch radius. What was causing this? Raymond inspected the loco on his work bench and discovered that the rear bogie truck’s metal frame was out of square. Every so often the wheelset would lock up in one of the axleboxes which would cause the bogie to lift onto the top of the rail head before allowing the bogie to drop off the track, Raymond trued up the bogie and it now appears that that bogie is tracking satisfactorily.

There are problems with the front truck on the K-37 too with one wheel lifting off the track at various times around curves and derailing. This problem is still being investigated and we have still to look at the K-36. We have also to check our other two K Class locomotives (K-36 and K-37) which are not yet fitted with decoders and so have not been run.

Sunday morning (10/07) we moved a cabinet which had been removed from the lounge/dining room upstairs into the shed. At this stage it is intended that this will only be temporary (about one or two years) as we will not really have any room for it when the last helix is put in. This cabinet is currently occupying a section of wall where that helix is to be installed. It is intended that this last helix will give us an option of continuous running but, as a general rule the layout will be operated as a point to point. This cabinet has a display case on top with glass doors and a cupboard underneath. I thought we could put some models on show in the display cabinet and use the cupboard for some additional much needed storage. Future storage may become available under the bottom deck of the layout when the lower level is built. I am hoping we can have low profile cabinets made on castors so they can be rolled out to allow access for maintenance under the layout when it is required.
Well, it turns out we didn’t manage to get the display cabinet into the shed. It was far too heavy with my wrist not being able to take the weight. They don’t call me Lefty for nothing.

I spent a pleasant Sunday afternoon running various locos backwards and for wards to try them out. We know we still have a problem with the K-36 and the K-37. Raymond is thinking through these issues. I tried Raymond’s K-28 No.470, It ran well so I don’t think we have any problems there. I also tried my C-19 2-8-0 No.345. It also ran well so I was happy with that.
Mountain Model Imports (MMI) C-19 No.345 during testing on the layout.
MMI K-28 No.470 during its test on the layout
Bachmann 2-8-0 being tried out

I then sat down at my work bench and started the second of two Porter tenders I had been making from a Boulder Valley Models kit. I had a couple of Kadee No.5 couplers already made up salvaged from one of my old New South Wales wagon kits (choke, cough, splutter). Wash your mouth out boy – we don’t talk about that funny New South Welshmen type rolling stock items here. They can’t even win a State of Origin series. Standard gauge – eeewwww!!! Once, I got over the shock of having to handle an old SRC wagon from my scrap box to salvage the couplings I did some modifications to the couplings and then fitted them to the tender deck. The remnants of the SRC went into the rubbish tip to become land fill. I then fitted a Steam Era Victorian Railways diamond frame bogie to the deck of the Porter tender. Now all I have to do is fit the superstructure and detail it.

Raymond spent a pleasant Sunday afternoon building his Foothill Model Works coal gondola. He had purchased some fine twist drills and a suitable pin vice (none of ours would hold these fine drill bits). He completed the bogies and has started on the body of this finely detailed model.
One of two bogies Raymond made for his Foothill Model Works coal gondola
A view across the goods yard with a row of MMI locos on the left-hand track - a K-37; K-36; C-19 and a K-28. They made an impressive line up.

Sunday, July 3, 2011

Around the Corner We Go.....

Well we still haven’t done any scenery but we decided we should extend the layout just around the back corner of the shed by about 600 mm. This would give us a headshunt using the main line so that we could run a loco around a train at either end of the yard along the left-hand side of the shed.

Firstly we did some shopping on Saturday morning. We went to HobbyOne where Raymond bought some brushes, tools and paint. We then went to Bunnings where Raymond purchased a Bosch Jigsaw and then on to Ray’s at Austral Modelcraft. Where I bought the latest issue of Narrow Gauge Downunder magazine and Raymond bought some more tools. We then planned to start work on the small extension in the afternoon but there were other forces afoot. “She Who Must be Obeyed” mentioned that she was going over to my daughter and son-in-law’s place to look after the grandson for the evening and would not be home for tea. “You will have to get your own” she says and then made the rather pointed comment “Of course I could have looked after him here if there was a gate at the top of the stairs” she says. Oh well, I had purchased a gate to be installed some months back and never got around to installing it. I told Raymond the bad news so we spent Saturday afternoon installing a child-proof gate at the top of our internal stairs.

Sunday arrives and Raymond and I made it into The Shed. We installed another two of the double-track steel tubing on the left-hand side of the back wall. We then made some more L-Girder for this short piece and installed them. This time I used two of the 2 X 1 pine timber to make the front L-Girder rather than one 2 X 1 and one 4 X 1 which, if you remember caused Raymond some anguish in installing points. Although, this time there are no points destined to be installed on this section.


The start of the section "Around the Corner"

The brackets are in and the first L-Girder is in place.

While Raymond broke for lunch I picked out a piece of ply and temporarily fitted it in place. I then got a length of track and tried setting it out to the required main line curvature of 36 inch radius. When he returned we discussed how to cut the ply and set to it before we installed it on top of the 4 X 1 supports which lie on top of the L-Girders.

Raymond was disappointed as the track curved close to the back wall of the shed. While there was enough clearance for the big locos (K-36 and K-37) there was insufficient room for a mountainside to come down from the back wall and the track to pass through a cutting.

We discussed three options – 1) Relay the track so that the points leading into the passenger station were further away giving a greater distance from the track centre line to the wall. 2) Put a “retaining wall” along that section of the rear wall of the shed and paint a mountain scene on the backscene. 3) Relay the curve with a 33 inch radius instead of the 36 inch radius currently set as the main line radius 4) Leave the track as is but enter a short tunnel with a mountain over the track where it is closest to the wall and continue the 36 inch radius curve around further so as to locate the track further away from the wall.

Raymond decided that number 4 was our best option.

We then pinned down the track to the 36 inch radius curve after Raymond had soldered on the necessary dropper wires to the rail. He then connected these dropper wires to the main bus wires.

Now it was time to test the layout. Raymond first tried my K-36 which he had previously modified because of problems with the pony trucks riding up over the rail and dropping off the track. It ran reasonably well out onto the newly laid section but during the return run the pony trucks dropped off the track. We tried several times and each time we had the same problem. The route had been set for the inner curve of a Peco Electrofrog Point. We tried sending it into the outer loop where the point has 6o inch radius, the inner being 36 inch radius. That seemed reasonably fine.
My K-36 tests the new track section.

Raymond then reversed his K-37 down onto the new section and we noted that one set of pony truck wheels lifted off the track. On trying to go back the other way the lead drivers derailed even on the curve of the open track. Gauge too tight we thought but no it was fine. During this manoeuvre the K-37 had to pass the K-36 on the adjacent track and lo there was a short as the locos touched. There was much grumbling and colourful language. We had previously tried these locos side-by-side at the opposite end of this passing siding through the station and they were fine – there was plenty of room. Investigating further we found that the two passing loop come closer to each other at the far end but there was still a small amount of clearance. The problem was being caused by the K-37 being such a big loco that when coming forward around a curve it wants to go straight ahead and so sideswipes the other loco (which was sitting on a straight right at the end of a curve). We checked the curves on the two loops and found the inner one was broader than 36 inches and the outer one was slightly sharper initially than I had intended before becoming 38 inches as I had intended..

We very reluctantly will have to lift part of one passing loop and relay it giving us a greater space between the tracks.

I am concerned at the serious problems we are having with the MMI die-cast locos. They are not cheap and I feel we are having far too many problems with them. Precision Scale claim that they require a 26 inch radius curve. Frankly, we are having problems with a 36 inch radius curve I shudder to think what problems we would have if we were using 26 inch radius curves.

Raymond built two Pewter kits during this last week. One was a “Hit-and-Miss” engine and the other a ship’s steam winch. He intends putting these as loads on flat cars. He also started building a Foothill Model Works wooden gondola kit and hoped to continue with it this weekend but that was not to be.
Raymond assembling the Hit-and-Miss motor.
The ship's winch after receiving an undercoat/primer

Sunday, June 19, 2011

Progress is slow but steady.....

It has been a while since I posted anything on my blog and even now I don’t have a great deal to say. That’s strange, I am at a loss for words. LOL.

Raymond and I finished the track laying and wiring for the station and yard which we had started some time ago. The reason being the Tuesday Nighters (alias Mackie’s Marauders) were coming to visit on Tuesday, 14 June. Their previous visit was supposed to view this station and yard completed to a stage that we could run some trains but that was not to be. They even had given us a month’s warning but we failed miserably.

A scene across the yard looking towards the station (depot) area, the carriage sidings and an industrial siding (with the K-37 standing on it)

You will have read about our problems with point motor decoders and I had mentioned we were going to use NCE SwitchIt and Switch8 decoders which we have found very satisfactory. The Switch8 is very easy to program as there is a numbered dial on the decoder where you select the point you are wishing to program using a small screwdriver to select which point you are programming. The Switch8 will control up to eight points. The SwitchIt is slightly more difficult. It will control two points but you have to use a jumper wire across terminals to select which points you are programming.

An NCE SwitchIt decoder. This one is only going to control one point (they can control two). One problem with these is that there are no mounting holes to fix the decoder to the baseboard frame. Raymond intends to use some double-sided tape for each of these so they can be mounted out of the way.

An NCE Switch8 wired up to control eight points. The screw pot used during programming is the white switch on the left of the decoder board.

Those of you who have been reading my blog will notice that recently I tried referring to points as turnouts which is probably more correct but I have been using the term points for more than 50 years as that is what my father (a signalman in the railways) always called them. I tried using the word turnout in one of my earlier posts but I kept falling back into my old habit of calling them points and it was becoming tedious to keep going back and changing the terminology, so I won’t “kick the habit” and will continue calling them points.
A Cobalt point motor installed under the layout. These seems to work very well and are more compact than their nearest rival.
Raymond installed the two sets of points at the left-hand end of the yard (nearest the sliding door). He then installed the Cobalt point motors and an NCE SwitchIt decoder and all the wiring. He used many choice words in doing this (he talks to himself a lot) as he tried to fit the Cobalt motors and wire each up. A major problem we found was that the baseboard framing along the front of the steel shelving brackets was made using an L-Girder using a 4 X 1 with a 2 X 1. I am a great believer in Lynn Westcott’s L-Girder construction method as it makes very strong yet light baseboard frame. I had placed the 4 X 1 in the horizontal position as I thought I would need to do this to access the screw holes in the metal brackets to secure the L-Girder to the metal bracket/wall framing. This proved to not be the case when inspecting the layout.

Raymond’s problem was that some of the Cobalt motors and also the wiring fittings were above that piece of 4 X 1 which made access impossible to either mount the motor or install the wiring or both. This caused Raymond lots of frustration and thus the choice words. The answer, as suggested by the Tuesday nighters previously was to use a Spade Bit to drill a hole through the 4 X 1 to give access to a screwdriver to mount the motor and also install the wiring. However, the Spade Bit was very messy.

One of the Cobalt motors mounted above the 4 X 1 of an L-Girder. The small height of the Cobalt motor is perfect for the location (its competitor would not fit). But the L-Girder makes access to the mounting holes for the motor and the wiring totally inaccessible.

One of the holes drilled through the 4 X 1 of an L-Girder to allow for access to wire the motor as well as mounting it. You can also see that the screw hole for securing the L-Girder to the steel bracket would indeed be suitable for a 2 X 1 instead of a 4 X 1.

When we do the right-hand side of the shed in August which will also use this double-slotted tubing and brackets I will make the L-Girders of 2 X 1 and 2 X 1 which as experience has shown will still give us some “meat” to fix the L-Girder to the metal bracket. This will mean that in future the L-Girder will not get in the way of the installation of the point motors.

We have purchased some scenic materials from Ray Nunn at Austral Modelcraft and our second work trolley is now kitted out. The top tray has all our track laying and most of the wiring materials while the bottom tray has an assortment of scenic textures, ballast and sundry material. I want to make a bracket to support the spools of wire across the trolley but will leave that for the time being.

We are still discussing how we want to do the scenery. I must confess, despite being involved in the hobby for more than 50 years this will be the first time I have actually tried to apply scenery material on my own. Most previous occasions I have just been a “gopher” assistant or an onlooker when the model railway clubs I have been in have been applying scenery to their club or display layout. To me, scenery is still a “magic art” and I have nothing but admiration for those who make it look so easy to come up with a masterpiece that looks so life-like.

Needless to say, the Tuesday Nighters came over on Tuesday. 14 June and I think they were suitably impressed with work so far. Brendan ran a train and others watched. The usual bull session discussions took place with everyone comparing notes. Every time a train went past on the Uniform Gauge Railway which runs past our back fence a number of the Nighters would race outside the shed to see what they could see. I must forgive them as they are New South Wales modellers after all. I don’t think there is a narrow gauge bone in their bodies. I tried to turn Brendan to the dark side (of On30) but, although he was interested in our layout and asked many questions as this was the first time he had visited us, and enjoyed running a train backwards and forwards I think he is too committed to his New South Wales “stuff”.


K-36 481 which Brendan drove up and down the layout. It had a set of AMS D&RGW coaches in tow.
Sandy River & Rangeley Lakes RR Forney No.12 an outside frames 2-4-4T

MMI K-37 No.499 stands at the end of an industrial spur.


Although we want to start on the scenery side of this first station, Raymond and I have been discussing our material requirements to continue the layout across to the right-hand side of the shed.