Saturday, August 30, 2014

No Progress - YET.....


Since my last post way back on 2 February this year there has been little to no progress on the model railway in The Shed. During the past months I have been harassed by Scooter and others to do an update for my Blog. I even have a friend in Houston, Texas looking forward to my next post.


My time has been taken up with work, an operation where I had to have 3 weeks sick leave and not allowed to do anything strenuous for 10 weeks. During the past 8 months I have been working on a book with three good friends and today I think there is light at the end of the tunnel. I have finished selecting all the images and writing the captions (I hope) and the book layout is currently being done.


We are carefully reviewing each few pages of the manuscript as the layout is completed making any final adjustments before it is sent off to the printer. The book is the story of the Hudswell Clarke steam locomotives purchased by the Colonial Sugar Refining Company for use in Fiji and Queensland. It follows on from a book we wrote back in 1982 about the last ten years of Hudswell Clarkes on the Herbert River near Ingham and because this year is the 100th birthday of the HOMEBUSH preserved in working order at the Victoria Mill in Ingham by Wilmar Sugar, the Singapore owners of the CSR Company.
HOMEBUSH is 100 years old this year.

The book is due to be launched in Ingham on Saturday 11 October, an event which I will be attending.

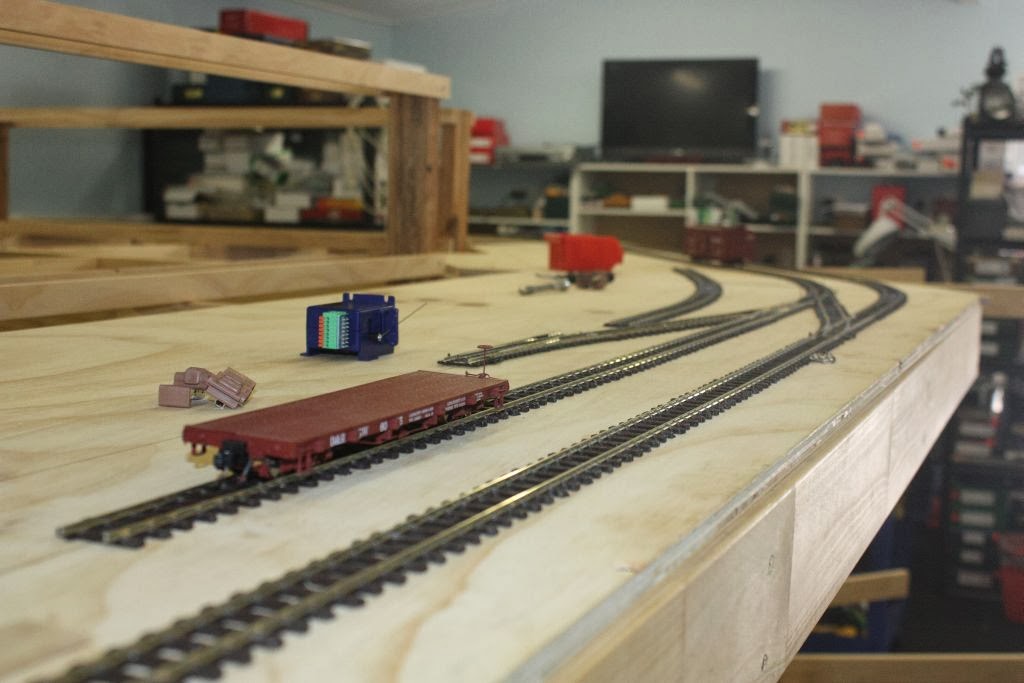
With the book now almost out of the way it is time for Raymond and I to turn our attention back to our On30 layout in The Shed.

We have been wanting to make a start on some scenery for quiet some time now but needed some MDF to make the backscenes. Accordingly this week an orde3r was placed with Mr Ply & Wood at Underwood for 21 lengths of 3 mm MDF 2400 mm X 400 mm. I also ordered what I hope will be the last delivery of plywood we will need – 4 sheets of 12 mm 2400 X 1200 mm.

The ply is required to cut out the track baseboard for the helix that will enable us to get from the top level to the lower level. The delivery is quick and painless. MDF costs only $10 per 2400 X 1200 sheet and the ply $30 plus $30 delivery. The delivery charge is certainly a lot different to that charged by that bulky DIY warehouse which is around $110/delivery. I had ordered 8 sheets of 2400 X 1200 MDF with 7 sheets to be cut to the 2400 X 400 size. Again, unlike that other place, there was no charge for cutting to size.

Hopefully, in the next couple of weeks, Raymond and I will start fitting the MDF as there will be a little bit of notching to be done to accommodate the framework. Once we work that out we will have to paint each a sky blue colour and start mapping in clouds, mountains etc before affixing the sheets to the layout framework.


Sunday, February 2, 2014

Stiil Making Progress.....

 
Work has continued on the layout these past few weeks since I last posted on this blog. We did have one major hiccup which caused us some anguish until Saturday afternoon (yesterday).

Raymond had started laying the track  and pointwork around past the Durango Station as seen in my last post but when the track passed across the join in the plywood to the section that heads directly towards the back of The Shed there was a rather significant peak in the track. This was obvious of course as the two sections of plywood were not smooth across the join with one section significantly higher than the other. We tried shimming up the plywood that was lower but that did not work. I had recently purchased a new 600 mm long spirit level to assist in lining up the track on the newly installed turntable and to augment our 900 mm long spirit level which was just too long for some tasks.

Looking towards the right-hand wall of The Shed

The main line and passing loop passing the Durango Station site. The building will be situated on the left of the left-hand track

The track now heads down towards the back of The Shed and the future helix. The join in the plywood which caused us so much heartache can be seen across the centre of this image

Placing this 600 mm long level along one sheet of plywood, even though we had reasonably aligned the two plywood panels it was like a ski-jump. The plywood on the second sheet just seemed to drop away. I recommended rebuilding the two sections of plywood and the baseboard framing to ensure the plywood sheets were in proper alignment.

This would mean lifting the track which Raymond had laid, something he was loathe to do. "We always seem to be redoing track" he says. He perservered last weekend trying to level and properly align the two plywood sections to no avail.

Raymond had been quite ill during the week and came home early on Wednesday. One of Raymond's very talented skills is his ability to think about a problem and come up with a viable solution without having to try it out beforehand. He has displayed this ability many times over the years and impressed staff at the former Railway Historical Centre (RHC), where he worked as a volunteer, when he worked out how to overcome a serious problem with a commercial archival database we were using. He went home with me one evening after work and appeared despondent but next morning he was keen to get to the RHC and test out a solution he had come up with during the night and it worked. This time despite the discomfort he was feeling with his illness he came up with a solution which he put to me yesterday afternoon.

I had gone to see my elderley father by myself on Saturday as Raymond was still not 100% and on the way home I called into Austral Modelcraft to purchase another twelve sets of points and packs of fishplates. When I got home at lunch time he put to me that we needed to lift two sections of track across the plywood join and then sand off the peak where the two boards met. He even directed exactly where we needed to smooth out the hump which was difficult to see. Numerous judicious sanding strokes were needed with a lot of level checks in between. I even broke three sanding belts in the process and had to take a quick trip to Bunnings mid-Saturday afternoon to buy several packs of sanding belts of different grit sizes.

The main line is in the foreground as it heads towards the planned helix. A row of buildings with a road in front will provide a street scene across from the third track which will be behind the flatcar.

Again we can see the plywood join which caused us so many problems as we look towards the section that will contain the Durango Station

Looking towards the right-hand wall. A Raggs to Riches Conoco Oil Depot served by a fishtail siding is planned for the left-hand side of this section and the piece of homasote nearest the camera is a Stoney Creek Designs Scrap Yard kit also to be served by a dead-end siding.

Finally we were satisfied and today Raymond relaid the track. Testing it for level and the runnability of rolling stock it appears perfect. Raymond has since spent the day installing Cobalt point motors and doing the wiring. He had run the Bus Wire yesterday afternoon and now, using suitcase connectors he has wired up the running track and point motors.

This feverish activity is to be ready for the Tuesday Nighters who are coming over this Tuesday night. We think everyone (except Scooter) will be pleased with our progress.

Monday, January 13, 2014

Trackwork Progress.....

Progress is continuing although we have a number of issues to sort out.

We have laid the plywood track base from the right hand wall around to and including the Durango Depot area. It took a considerable effort for us to make sure the curves were true and the plywood was level.


The plywood track base is being added to the baseboard framework. Here we are looking from the location of the Durango Depot towards the right hand wall.

The main line curves around at the right hand wall heading towards the back of The Shed.

The Durango Depot area where the main line curves back down the centre of The Shed on the peninsula. The footprint for the Durano Station building is the piece of 3 mm MDF on the left. It is huge! 46" X 11"

We again have gone through the hiatus of track standards. I printed out another S-7 Standard from the NMRA and some measurements seem to differ to what we had previously. Our concern included the fact that the main line track would be entering the Durango Depot platform on a curve. How much clearance to the platform should we provide? We opted to remeasure one of our K-37 locos to ascertain the widest point using Vernier calipers. This happens to be the window shades over the cab windows which comes out at 68 mm (say 70 mm). So, as we have done previously we have settled on 3 1/2 inches between track centres which should give us a 1/2 inch gap between the cab shades on two K-37 locos passing each other.

Track laying the main line using Brunel Hobbies and Tracksetts templates.

We have settled on this clearance yet again. The minimum curve on our main line is 36 inches so as the main line will be the outer loop into Duirango Depot that curve is a shade over 39 inches and we have made the inner (passing loop) 36 inches. Today we marked out the track centres from the right hand wall through to half way along the Durango Depot. We have now laid the track from the right hand wall as far as the turnout for the main line/passin g loop into Durango Depot.

Raymond has tested this track with a K-36 and everything runs smoothly.

K-36 No 481 stands at the end of track that has just been laid.

Over the past couple of weekends we have also been working on the locomotive depot for the upper terminus along the left-hand wall.

Start of the locomotive depot being built at the end of track on the top level on the left hand wall. The turntable facility is needed to turn the tender engines for their return back around the layout as well as providing some accommodation for our many locos.

The DC Walthers HO Scale130 ft turntable pit has been installed and we have started working out the track requirements.

The turntable required is 65 feet long to allow for the K-36 and K-37 Class 2-8-2 locomotives. It is actually a Walthers HO Scale 130 ft turntable (65 ft in O Scale)

Being a HO Scale turntable our big engines would plough out the handrails and turntable cabin so here is the turntable bridge following the removal of the hanrails and cabin. We will be adding new wider decking as befits the requirements of our locomotives.

The turntable bridge uses Code 83 rail so we visited Austral Modelcraft last week and purchased a box of Peco Code 83 Flex track together with four lengths of adapter track Code 100 to Code 83. We also had a long discussion with Ray and a fellow modeller, Arthur, who both have had experience with the Walthers turntable. From the advice they gave us it appears that the older DC turntable will fit in very well and we need not have worried about any issues with DCC. The newer DCC turntable however, is another matter. It apparently is very susceptible to losing its memory regarding track settings when selecting on of the roads off the turntable. Each road has to be programmed twice (once for each end of the bridge). If there is a power interuption for example when a short circuit occurs or when you turn off the main power to the layout at the end of an operating session you have to reprogram every track again. We have not progressed the track layout on this section while we try to work out how we can overcome this issue with the DCC turntable. Ray/Arthur suggested having a separate DCC power supply just for the turntable - which we will do. There are several separate power circuits in The Shed for the layout and other uses. Near the DCC turntable there are four power points on a separate circuit to everything else. I am thinking we will leave those four power points on all the time even when we shut down power to the layout. We can then plug the DCC power supply into one of these power points and the power will be on all the time. Thunderstorms will be a problem though and will probably fry the DCC chips. We are still considering our options.

Wednesday, January 1, 2014

But Wait Ther's More.....

Both Raymond and I had discussed what our objectives were for the Christmas Break. We had decided that we needed to start work on the locomotive depot planned for the upper terminus before we continued with the plywood base and track laying on the top deck of the centre modules.


The upper and lower decks at right angles to the right hand walls ready for the plywood track supports and track laying to commence

The centre peninsula also clearly showing the overhang extension of the framing outside the footprint of the standard layout space.


Following instructions suggested by Darren we had made the 4 X 1 supports extend beyond the footprint of the rest of the modules as it was on this front corner we were planning to install the Raggs to Riches Durango Depot kit as a feature that could be easily seen when firt entering The Shed. The Durango Depot is some 48 inches long and 11 inches wide. I also wanted to have an extra space in front of the depot for scenery. With this extension of width for the baseboard framing we needed to know that the walkway between this corner and the two proposed (upper and lower) locomotive depots on the left hand wall would be sufficient. I am hoping for preferably 3 feet.

The corner modules again showing the overhang outside the layout footprint. These extensions will be shortened to suit the requirements for the Durango Depot on the upper level and also keeping in mind the need to maintain sufficient accessway between this module and the lower level locomotive depot on the left hand wall

Now we knew that the upper level locomotive depot along the left hand wall would not be a problem as it would be no wider than 2 ft 6 ins and narrowing down to only about 6 inches wide towards the entry door to The Shed. The lower level could be a potential problem, however. I planned to have an 18 inch wide accessway between the left hand wall and the lower locomotive depot (under the upper level loco depot). The lower level loco depot like that on the upper level would incorporate a Walthers HO Scale 130 ft turntable which equates to a 65 ft turntable in O Scale and therefore big enough to accomodate those large Colorado narrow gauge engines of the K-36 and K-37 Class. Obviously the bridges on these turntables would have to be modified to accomodate the widths of these locomotives. The turntable and locomotive depot on the bottom level is also intended to be a layout feature on entry into The Shed as it will be outside the footprint of the upper level locomotive depot..

The upper level locomotive depot baseboard under construction.

The upper level locomotive depot baseboard under construction. The open space underneath will be occupied by the lower locomotive depot extending on from the baseboard framing that can be seen on the lower right.

The Walthers HO Scale 130 ft turntable in position for the upper locomotive depot. The turntable bridge has handrails and a cabin for HO Scale locomotives. These will have to be removed for the O Scale locomotives and new basswood decking, cabin and handrails fitted to suit the "big" engines.
I had purchased this Walthers turntable some years ago as I had always planned to have a locomotive depot and turntable capable of handling the K-36 and K-37 Class locomotives. Now we would need two of these turntables as another would be required for the lower deck. Raymond gave me the second 130 ft turntable for Christmas with this one in a blue box and clearly labelled as being fitted with DCC as distinct from my original which came in a red box and was DC only but was supposedly "DCC convertible".

We have since investigated the DCC Conversion Kit and found their RRP is almost $200 and that they are very difficult to install. We have decided that in the long run it will be best that we purchase yet another DCC turntable (in the blue box) at about $450 and since the original has not been used we will try to sell it "as new". We obviously will not get back our original outlay.

The turntable bridge is fitted with Code 83 Rail so this again is a problem and we have decided not to lay any track on the new loco depot module until we purchase a box of Code 83 Peco FlexTrack and a number of Code100/Code83 Adapter pieces. We will us the adapter pieces for the two tracks leading omto and off the turntable connecting to the main track and all dead-end tracks off the turntable will be laid in Code 83. Austral Modelcraft is open again this weekend after Ray and Aileen have had their Christmas break so we will, hopefully, be able to purchase our Code 83 requirements and also our third (!!!!!) 130 ft turntable. If we can purchase our Code 83 requirements we should be able to lay the track in the loco depot area before the end of the weekend.