Sunday, July 18, 2010

The Shed progresses.....

I now started purchasing timber moulding strips to finish off the shed after everything else (plastering and painting) was done. Our plasterer had also suggested we buy some timber strips to screw under each truss to support the 10 mm thick plasterboard.

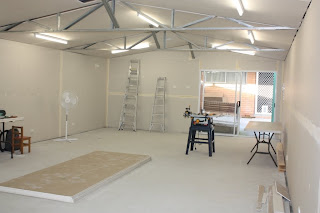
The shed complete except for sheeting the trusses with plasterboard. 26/04/2010

Another view of the shed with the plasterboard on the wall and ceiling complete. 26/04/2010

The power board near the door into the shed. 22/04/2010

One problem I found was that there was no timber suitable to put under the trusses. The steel truss was 80 mm wide so we needed timber 100 mm wide. The pine dressed timber went from 90 mm wide to 110 mm. We needed to cut off a 10 mm strip. I made many enquiries to timber suppliers without much encouragement. I decided I would need to purchase a bench saw that would do this task but then baulked at the cost. Eventually, I decided to purchase a Ryobi Bench Saw which was on special at Bunnings for $389. I had convinced myself that it would come in handy during the construction of the layout as well as for the trusses in the shed. Raymond and I took a weekend to put it together – something akin to an item of Ikea furniture. We took another afternoon on a following weekend to install an 80 teeth blade in place of the 40 teeth blade the saw comes with. I have nicknamed this fearsome looking contraption "The Beast".
"The Beast", the Ryobi bench saw after assembly. 26/04/2010

Queen’s Birthday long weekend Raymond and I thought we would be able to get the three roof trusses done. It was not to be. We took two and a half days to install the plasterboard on just one truss and in doing this work I fell off the ladder and Raymond tore a tendon in his foot.

The day following the public holiday I made a distress call for help to our home handy man, RayM, who offered to come the following Tuesday to do the work on the trusses.

On Tuesday 22 June RayM duly arrived at 7.30 am. By lunch time he had sheeted the remaining two roof trusses with plasterboard, put 100 mm wide timber under each of the five steel angle braces and sheeted all five with plasterboard. While we were having lunch RayM says to me “You certainly made a fine fist of the plastering. I don’t want to knock all the hard work you have put in BUT you haven’t done it correctly. I’ll show you how it’s done after we have lunch.”
RayM at work sheeting the remaining trusses. 22/06/2010

All plasterboard work is now complete. 22/06/2010

Plasterboard sheeting is complete including the angle braces. 22/06/2010
After lunch, suitably chastened, I watched as RayM sanded down all the joints around the walls (except the four corners) then applied the second coat of plaster over the smoother surface. “That”, he says “Is how you do it”. I looked at his handiwork. “Smooth as a baby’s bum” I thought.

He had completed all four walls in just under 3 hours. I had taken days to do the same task and not to as high a standard.
RayM spent the afternoon rectifying my mistakes in the plaster joints around the walls. 22/06/2010
I now only have to sand the first coat of plaster on the four corners and the ceiling and then apply the second coat, although RayM promised he would come back to do it if I was not confident. Once the ceiling and corners are redone, we agreed that he would come back to put the final coat of plaster on the whole shed.

Sunday, July 4, 2010

The Shed Continued.....

I phoned around for quotes for the plasterboard required as per the shopping list compiled by our home handyman, RayM. I decided that Plastamasta were offering the best price and they could also supply the required insulation batts. When I rang them back to place the order they wanted to know if I was in a hurry for the material as, if I waited to the following Saturday week they were having a yard sale and the plasterboard sheets I was after would be considerably cheaper. So, I waited, and visited their yard at Coopers Plains on the appointed Saturday. I discussed my requirements with their staff and they were more than helpful. The plasterboard and rolls of insulation batts were delivered on the 2 February. The savings were well worthwhile too at nearly $900 between the purchase price at Plastamasta and other plasterboard and insulation suppliers.

The plasterboard and rolls of insulation have arrived in the shed. 2/02/2010

After further discussions with my home handyman, I decided to purchase timber battens for the ceiling of the shed rather than using the steel battens I had already purchased from Titan. The timber battens (70mm X 35 mm structural pine) cost $470 but I had outlaid $870 for the steel battens. However, I considered that I would have a use for the steel battens for the upcoming Garden Railway Project. The timber battens were delivered on the 17 February. The substitution of timber battens instead of the steel was to prove beneficial in other ways. We had found that drilling screws direct into the steelwork was very difficult if not almost impossible. Screwing the plasterboard to the wooden battens on the ceiling was a breeze.
The timber battens. The steel battens are in the background. 17/02/2010

RayM came on the 10 March to install the ceiling battens and the ceiling insulation which had a rating of R2. Things were starting to move quite quickly now.
RayM, the handyman, installs the timber battens. 10/03/2010

The battens and ceiling insulation are complete. Raymond's ghostly figure stands in the doorway to the house. 10/03/2010
I had helped RayM to install the insulation for the ceiling, so I was confident that Raymond and I would be able to install the R1.5 insulation for the walls. We achieved this with no serious problems over one weekend.
Raymond and I installed the wall insulation. 5/04/2010

Wall insulation. 5/04/2010

He came on the 8 April and again on the 9 April when he sheeted the plasterboard firstly to the walls and then we did the ceiling. Again this went very well. I was confident Raymond and I could install the final sections of plasterboard on the end walls and on the trusses.

Wall sheeting completed. 8/04/2010

Ceiling and walls sheeted. 9/04/2010

Our electrician came back on the 14 April and completed the electrical fit out of the shed. After testing we now had power inside the shed and lights. During the latter part of April, Raymond and I finished installing the plasterboard on the top of the two end walls and around the sliding glass door. The annual Brisbane Miniature Show over Labour Day long weekend stopped work on the shed for a while and I then came down with severe bronchial asthma which prevented us from doing much work during May. We had managed to start plastering the joins between the plasterboard on the walls and ceiling however. We had applied the first of three coats by early June.
Lighting and power points installed. 14/04/2010

Lighting and power points installed. The sub-powerboard can be seen just to the right of the door. 14/04/2010
Now we had to sheet the trusses with plasterboard and finish the plastering before we could paint the room.


Saturday, July 3, 2010

Now Back to The Shed.....

Soon after we got back from the UK, in July 2009, the shed underwent its building inspection and was duly approved. Work could now proceed to make the shed a suitable home for our On30 model railway.

To make it suitable for habitation we had to insulate the shed, fit plasterboard sheeting, provide an electrical supply and paint it.

Before the slab for the pergola was laid we purchased some suitable conduit from Hayman’s Electrical and our electrician sold us some suitable cable to run the power from the house power box to a sub-switchboard in the shed.

The contractors we had do the slab laid the conduit before pouring the slab. The contractors also inserted the electrical cable through the conduit to the shed. The cable was put through and both ends of extra cable were rolled up and protected from the weather in a heavy-duty plastic bag. Bear in mind this work was actually done 1/07/2008. It was to be another 19 months before the electrician would be called on to start cabling inside the shed although the he did put the cable through into the shed when he came to install lighting on the veranda and in the pergola area.
The conduit comes out of the slab at the corner of the house. The plastic bag protecting the rolled up cable can be seen next to the brickwork just past the down pipe.

The orange conduit was laid along the front edge of the pergola slab as can be seen here.

We needed to purchase extra steel studs for the shed walls and also battens for the ceiling. I ordered these from Titan and hired a utility on the 8 September 2009 to collect them from their Crestmead factory.

I arranged for a home handyman to repair and stabilise the fence on the top side of the house which had developed a lean. He also made and installed a gate on the top side of the house. He indicated he could help with the plastering and insulation of the shed as he was qualified as a plasterer and had the frame needed to raise the sheets of plasterboard up to the ceiling.

During the next three months Raymond and I installed the additional studs around the walls of the shed. At the same time we drilled holes and inserted nylon grommets to carry the electrical cabling around the shed. This was tedious work as we found we could not get the self-drilling screws to penetrate the steel! We had to first drill a pilot hole which made the task twice as long swapping between a drill and the Phillips head screw bit.
One wall of the shed before the extra studs were installed.

Raymond hard at work installing the extra studs.

The wall in the first photo now has the extra studs installed

A line of holes with the protective grommets installed for the electrical wiring.

We had finished this work by mid-January 2010 and called our electrician to undertake the cabling of the shed. He did this work on the 26 January. The home handyman, Ray, also came and compiled a list of the sheet sizes of plasterboard we required so I could place an order.
The power box area and cabling after installation

Cabling installed in the future work bench are.